11. Setting up the site
You will need several online accounts and programs installed on your computer to set up the site.
- Sign up for a GitHub account. Read GitHub’s FAQs for an introduction to using GitHub.
- Install Git on your computer. See instructions here. (You may need other software installed for Git to function – on a Mac, you will need Xcode.)
- Install Node.js and npm. See instructions here.
- Install Visual Studio Code (or use your preferred source-code editor, such as Atom or Sublime Text).
- The rest of the instructions assume you are using VS Code, though can be adapted to another editor if you have coding experience.
- If you have not used a terminal before, see a background explainer here.
- VSCode’s guide to using the program with GitHub may also be helpful.
- Within VSCode, install the GitHub Pull Requests and Issues extension here.
- Sign in to VSCode with GitHub to connect your accounts.
- Sign up for a Mapbox account here.
- Sign up for a Supabase account, logging in with your GitHub profile.
- While signed in to GitHub, fork the template tracker’s repository, using the "Fork" button at the top right of this page.
- You should rename your repository to something more meaningful, like “[your city name]-development-tracker.”
- From VSCode on your computer, clone your newly-forked repository to your local computer:
- Open the Command Palette by entering Ctrl + Shift + P.
- Type
gitcl, then selectGit: Clone. - Select your newly forked repository and select a folder on your computer to save it to.
Before you can begin development, you'll have to make changes to two files that sit at the root of your site.
The file .env.development.example contains environment variables used in your application. These are principally API tokens that are used to connect to Airtable, Mapbox and Supabase.
This file will not be committed to GitHub, since it contains sensitive information -- that's why it's included in the .gitignore file.
You will eventually want these environment variables to live in Netlify; more on that later!
First, you need to rename the file to .env.development.local from VSCode’s explorer.
You should already have an Airtable account; the next step is to get your personal API key and the ID of your Base.
- Find your API key on your Airtable account page. You will have to click the purple input box to reveal the API key.
- Copy this value as the
AIRTABLE_API_KEY(after the=sign) in.env.development.local. - Find the ID of your base: From the Airtable API documentation, select your base. The base ID, which starts with
app, is the value you need. - Copy this value as the
AIRTABLE_BASE_IDin.env.development.local.
Mapbox is used for the map on the site, as well as to geocode the addresses attached to each project.
- On the main account page, click "Create a token" to create a new access token.
- Copy that access token as the
NEXT_PUBLIC_MAPBOX_ACCESS_TOKENin.env.development.local.
- Create a new project, named
development-tracker. (It may take a few minutes to set up before you can proceed.) - Create a new storage bucket, named
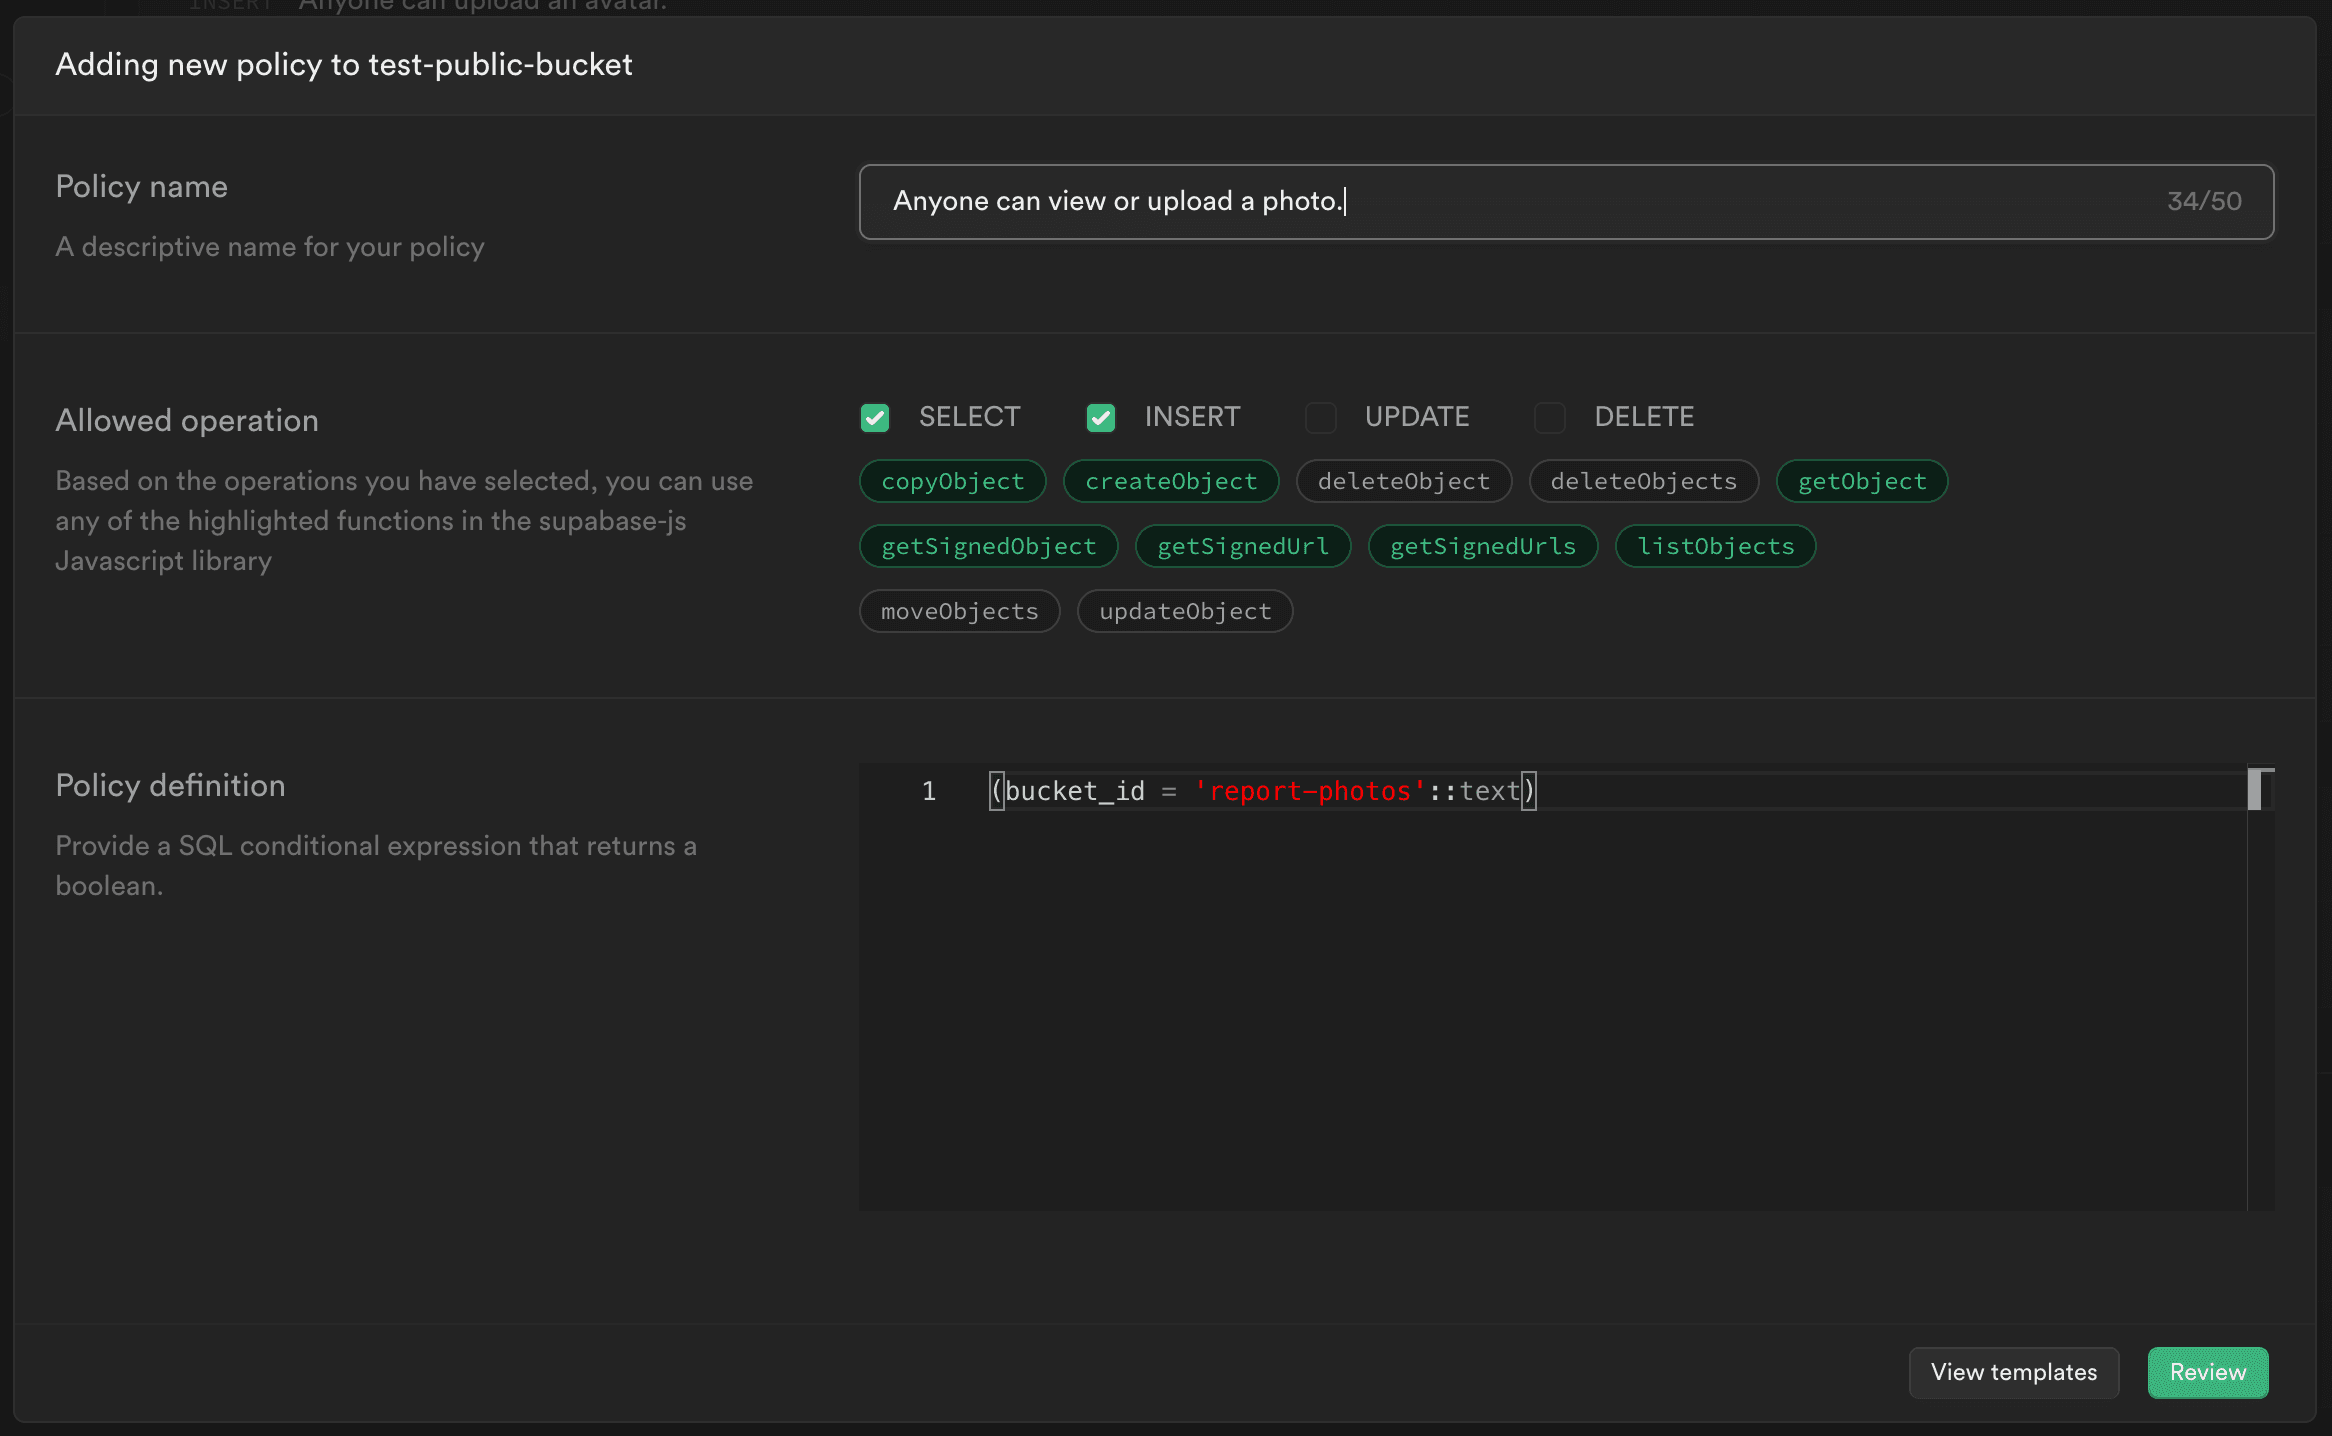
report-photos. Make sure that the "public bucket" option is checked. - Go to "Policies" under "Configuration" to create a "New policy" on the
report-photosbucket. - Choose "Create a policy from scratch."
- Create a new policy.
SELECTandINSERTshould be checked. - For policy name, enter:
Reviewing policies to be created for report-photos - For policy definition, enter:
(bucket_id = 'report-photos'::text)
- Create a new policy.

- Navigate to your Supabase project settings, found in the gear icon on the bottom of the left-hand sidebar.
- Click "API" under "Project Settings."
- Copy, the
anonpublicAPI key, starting withey, as theNEXT_PUBLIC_SUPABASE_ANON_KEYin the.env.development.localfile in VSCode. - Under "Configuration", copy the URL of the Supabase project including the
.supabase.cosuffix as theNEXT_PUBLIC_SUPABASE_URLin.env.development.local.
Congrats! You've configured all the underlying services - you're ready to run the development server.
Now that you're done configuring the site, it's time to run a development server locally so you can make changes to the site and test those changes on your local machine before pushing those changes to your GitHub repository.
Within VSCode, while you are working within the root directory of your site, open the terminal (Menu > View > Terminal). Then run the command run npm install. (You “run” by entering that text and then hitting enter.) Installation may take a few minutes.
Then, run the following command: npm run dev.
You should see a message in the terminal:
ready - started server on 0.0.0.0:3000, url: http://localhost:3000
Go to your browser and navigate to http://localhost:3000 -- you should see a live copy of the template site!
In the next section, you'll learn how to customize necessary elements of the site.
Table of contents
- About this guide
- How to use this guide
- What you will need
- Initial questions to ask
- Starting with the data
- Organizing your data: Airtable basics
- Setting up your Airtable base
- Using the Projects table
- Using the Contact Us table
- Using the Tips table
- Setting up the site
- Customizing the site
- Publishing the site
- Managing your development tracker
- Harnessing public engagement and support
- Launching your tracker for the public
- Getting in touch with us